The HoMedics humidifier has two red lights that must be turned off manually. We’ve researched the red lights on HoMedics humidifiers, their meaning, and what to do about them. We’ll provide the best answer below. The red light indicates a low water level on the HoMedics humidifier. When you add water, the red light turns green again. A green light means that you have enough water to operate normally.
The cleaning indicator is another red light that may appear on the HoMedics humidifier. The presence of this light indicates that the HoMedics humidifier should be cleaned. If your humidifier leaves white dust, you must use distilled water instead of normal water.]The following section describes troubleshooting the two red status lights mentioned above to avoid damaging or injuring the HoMedics humidifier. Please continue reading to learn about other common problems and how to solve them.
Table of Contents
ToggleHoMedics Red Light Causes
Let’s look at some of the most prevalent causes of red light on hoMedics humidifiers.
Insufficient Water
One of the most common causes of the red light remaining on is a lack of water in the humidifier’s tank. Most HoMedics humidifiers include a safety function prohibiting the machine from operating if the water level is too low.
Maintenance of Filters
If your HoMedics humidifier has a filter, it may become clogged or unclean over time, impacting the performance of the machine. For information on filter maintenance, consult the manufacturer’s instructions. Most filters can be cleaned or replaced as needed.
Cleanliness
Dust and mineral deposits might build up in the humidifier, causing issues and triggering the red light. Clean and descale your humidifier regularly, following the manufacturer’s instructions. A clean unit runs more effectively and produces cleaner indoor air.
Sensor Issue
In some cases, the red light may be caused by a sensor fault. If you’ve eliminated all of the above possibilities and the red light persists, call HoMedics customer service for assistance. They can assist in diagnosing and resolving sensor faults.
Also check: Honeywell Humidifier Not Working – How to Reset It?
| Image | Product | Features | Price |
|
Best Seller

|
Homedics TotalComfort Plus Humidifier |
Large Air Humidifiers for Bedroom, Plants – Top-Fill 5.3L Water Tank with Cool and Warm Mist |
$99.99 |
|
Best Seller

|
HoMedics Humidifiers for Bedroom, Home, Nursery, Office and Plants |
Total Comfort UV-C Ultrasonic Humidifier, Leak Resistant Design, 0.97 Gallon Tank, 35 Hour |
$58.58 |
|
Best Seller

|
Homedics TotalComfort Humidifier – Large Air Humidifiers for Bedroom, |
Large Air Humidifiers for Bedroom, Plants, Office – Cool Mist, |
$42.24
|
|
Best Seller
|
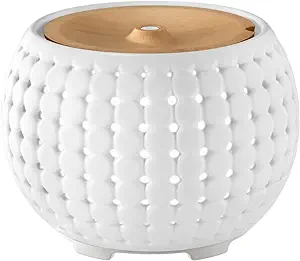
Ellia,Gather UltrasonicAroma Diffuser,White,Ceramic & Wood,200m |
Humidifier with Color-Changing Light & Mood Sounds,10 Hours |
$97.52 |
|
Best Seller
|
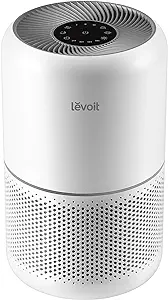
LEVOIT Air Purifier for Home Allergies Pets Hair in Bedroom |
HEPA sleep mode, Remove Dust Smoke Pollutants Odor, Core300-P, |
$84.96
|
Precautions for safety
Before removing the reservoir, turn off the HoMedics humidifier. Unplug the pool from the wall to avoid accidental activation when refilling and reinstalling it.
Fill the humidifier tank halfway.
Most HoMedics’ new humidifiers include a desalting cartridge in each reservoir (the two-reservoir model comes with two desalting cartridges). Refilling the humidifier is a great time to try out these cartridges. It usually lasts two months, but hard water in the humidifier can shorten that time to less than a month. Fill the reservoir with clean water after removing the plastic cover. To extend the life of the HoMedics humidifier, use filtered water. Using distilled water is even more effective.
Replace the container on the base and the plastic cap on the container. Reconnect the humidifier and turn it back on.
How to Clean a HoMedics Humidifier Properly:
The cleaning indicator is another red light that may appear on the HoMedics humidifier. This indicator is a timing light that enters the humidifier’s electrical circuit after a particular time.
A cleaning indicator indicates that the humidifier should be cleaned. Follow the detailed steps below to clean your HoMedics humidifier properly and safely.
Useful Materials:
Before you begin cleaning your HoMedics humidifier, please look at the list of items that can be used to clean it.
- Swab of cotton
- White vinegar
- Pure water
- small plate
Let’s get started cleaning the HoMedics humidifier.
Cleaning method:
- Unplug the power cable and turn off the humidifier.
Unplug the power cord and turn off the humidifier. It is a precautionary measure to prevent the sensor from being accidentally triggered. It will keep water from entering the area where the humidifier should be.
- Drain the Water Reservoir
Carefully drain the water repository (or supplies if you have a two-repository model) and remove the covers to open it. Drain the water while covering the opening with a couple of fingers. It allows you to retrieve the Demineralization Cartridge without falling to the sink’s bottom and possibly breaking.
Put the cartridge away. Repeat the process for the other repository if you have a two-supply model.
- Empty the Humidifier Base of Water
Keep the power rope away from the sink to avoid getting it wet.
A bolt focuses on where the water should be depleted or spilled. To drain the water, slant the base towards the bolt’s path. Following that, set it aside.
- Consume the Reservoir Vinegar/Water Solution
Take the supply and fill it with white vinegar and water. Fill the two repositories with one cup of vinegar and one cup of water, assuming you have two. It is best to use white vinegar with an acidity of around 6%.
Using vinegar on your repository cleans and relaxes any mineral stores that may have accumulated inside. Furthermore, white vinegar is an effective sanitizer that can kill the repository’s microbes, molds, and parasites.
Allow the solution to soak through the repository.
- Uncover The Transducer
Take the humidifier’s foundation and turn it on the back facing you. Locate the small cover near the bottom of the base. It has a bolt that points to the back of the machine or towards you.
Grab the handle of this cover and pull it towards you, then upwards, to remove it. By removing the cap, the transducer was revealed. Remove the cover.
- Use a vinegar/water solution to clean the transducer and ring.
Fill the small dish halfway with water and halfway with white vinegar. Plunge a q-tip into the arrangement.
To remove mineral deposits, use a q-tip to clean the dark ring inside the transducer. Do the same thing for the area surrounding the dark circle.
It is finished when the dark ring is smooth and sparkly with no white deposits.
- Clean hinged floats
Then, clean the pivoted floats using a q-tip dipped in white vinegar. Clear it of mineral deposits so that the floats can roam freely.
- Wash and rinse the humidifier base
Pour a tablespoon of white vinegar solution into the humidifier base and use a q-tip to remove mineral deposits. Where there are mineral stores left, it will feel harsh or sandy. It will feel smooth once you’ve removed all of the mineral stores. Wash the humidifier base with clean water, and slant it in the indicated direction each time you dump the water after flushing. Dry the wet humidifier base’s outer regions with a paper towel, paying particular attention to the power link and the power link itself.
Replace the humidifier base and reattach the transducer cover.
- Reattach the reservoir and add a solution.
Take the supply and shake the arrangement inside the surface to wash it. Dump the reservoir into the sink and thoroughly rinse it with clean water.
Fill up your water bottles.
- Examine Demineralization Cartridges
Examine the demineralization cartridges. You should replace them if they appear excessively dull or rotten.
If you need to replace your demineralization cartridges, try HoMedics 4-pack replacement cartridges.
Replace the demineralization cartridges in the repository and reconnect the power supply to the humidifier base. Re-secure the storage covers.
- Modules and Resets
Check the power link before plugging it in; it should not be wet. Connect it and turn on the humidifier.
On the HoMedics humidifier faceplate, press and hold the red reset button. After about 3 seconds of holding the reset button, the red light on the reset button and the perfect pointer light will go out.
Also check: Vicks Humidifier Not Working – What to Do?
When Should You Clean Your Humidifier?
The HoMedics humidifier has a pointer light that alerts owners when it is time to clean it. If your model lacks this feature, cleaning your humidifier regularly is ideal, assuming you use it twice a week. If you use your humidifier every day, clean it once a week.
If you use hard water, you should clean your humidifier more frequently because mineral deposits accumulate faster.
What To Do If Your HoMedics Humidifier Red Light Stays On!
The HoMedics humidifier has two red lights illuminating to inform owners of its status. They typically stay until the activity is completed to address the situation. Fortunately, they are simple to manage and assist in keeping up with the humidifier.


